
Are you struggling to keep your business finances organized in QuickBooks? Making journal entries might sound complicated, but it’s actually simpler than you think.
Understanding how to create accurate journal entries can save you time, prevent costly mistakes, and give you clearer insight into your financial health. In this guide, you’ll learn step-by-step how to make journal entries in QuickBooks, even if you’re new to accounting.
By the end, you’ll feel confident managing your books like a pro. Ready to take control of your finances? Let’s dive in.
Credit: www.dummies.com
Journal Entries Basics
Journal entries are records of financial transactions. They show which accounts are affected and by how much. Each entry has at least one debit and one credit. The total debits must always equal total credits. This keeps the books balanced.
Use journal entries to fix errors or record complex transactions. Examples include adjusting expenses, recording depreciation, or correcting mistakes. They help keep accounts accurate and up to date.

Credit: quickbooks.intuit.com
Accessing Journal Entry Feature
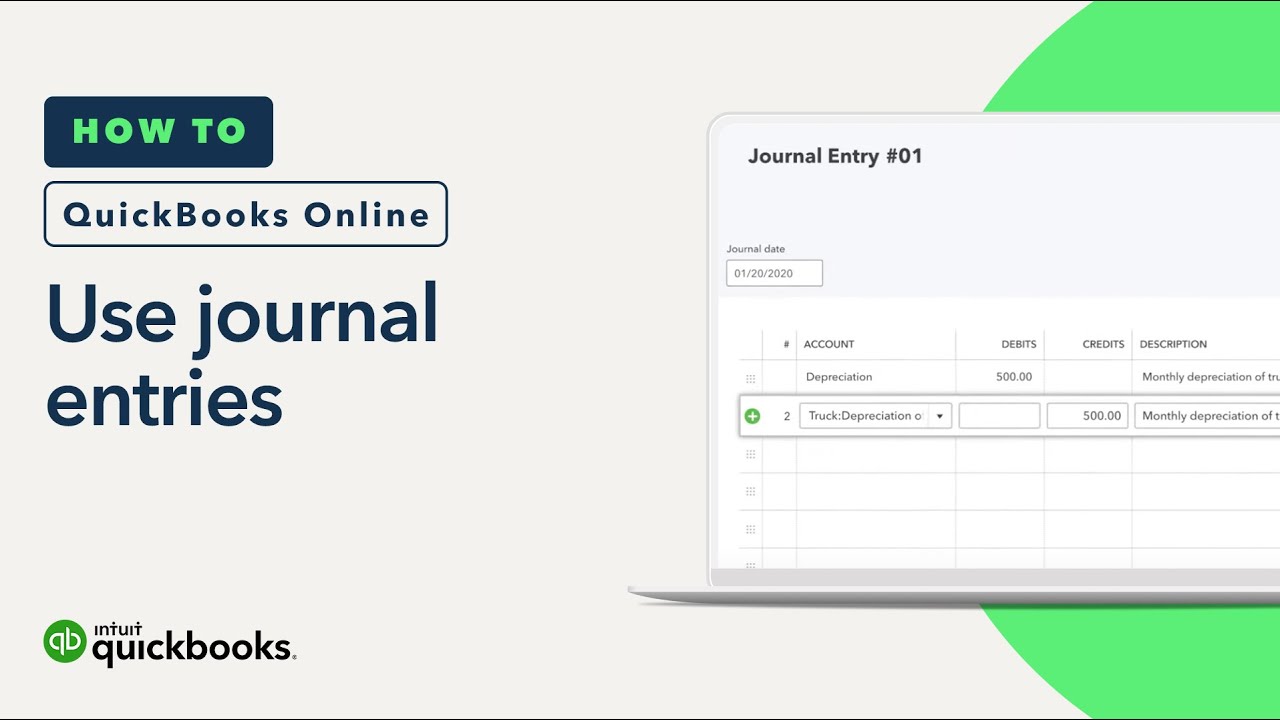
Open QuickBooks and find the Dashboard on the main screen. The dashboard shows different options for managing your accounts. Look for the “+ New” button, usually on the left side or top of the screen. Click it to see a list of actions you can take.
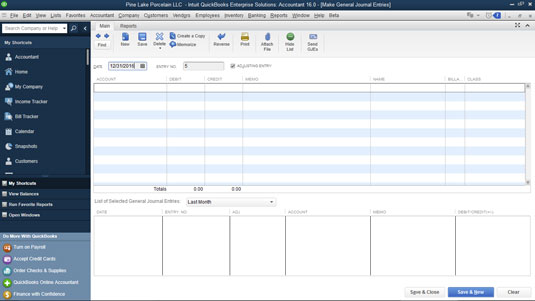
From this list, select “Journal Entry”. This will open a new window where you can create your entry. The journal entry window has fields to enter the date, accounts, debit, and credit amounts. Make sure your debit and credit totals match before saving.
Creating A Journal Entry
Start by entering the date for the journal entry. Use the reference field to add a note or number. This helps you find the entry later.
Add the debit account first. Enter the amount in the debit column. Next, add the credit account with the same amount. This keeps your books balanced.
Make sure the total debits equal total credits. QuickBooks will warn you if the entry is not balanced. You cannot save an unbalanced journal entry.
Customizing Journal Entries
Descriptions and memos help explain each journal entry clearly. They show why the entry was made and what it is for. Adding these notes makes it easier to understand your records later. You can type a short sentence or a few words in the memo field.
Attaching supporting documents like receipts or invoices adds proof. These files keep everything in one place. You can upload PDFs, images, or other files directly to the journal entry. This helps with better tracking and audits.
Saving And Reviewing Entries
Saving drafts in QuickBooks lets you keep journal entries without finalizing them. This is useful when you need to check details later or get approval. You can return to drafts anytime and continue editing.
Editing existing entries is simple. Find the entry in the journal list. Click to open it. Make needed changes like amounts or accounts. Save the updated entry to keep records accurate.
Common Errors To Avoid
Unbalanced entries cause errors in QuickBooks. Every journal entry must have equal debits and credits. Without this balance, the software shows mistakes and prevents saving. Double-check amounts before saving.
Incorrect account selection leads to wrong reports and confusion. Choose the right accounts for each transaction. For example, use expense accounts for costs and income accounts for sales. Picking wrong accounts can mess up your financial records.
Tips For Accurate Journal Entries
Double-checking amounts helps avoid costly mistakes in journal entries. Always review the numbers twice before saving. Use calculator tools to confirm totals. Ensure debit and credit amounts match exactly. Mistakes can cause wrong reports or tax problems. Take time to verify each figure carefully.
Keeping clear records means organizing all your source documents well. Store receipts, invoices, and bank statements in one place. Label files with dates and details for easy finding. Clear records make it easier to trace errors later. Use consistent naming for files and folders. This habit saves time during audits or reviews.
Credit: www.youtube.com
Frequently Asked Questions
How Do I Create A Journal Entry In Quickbooks?
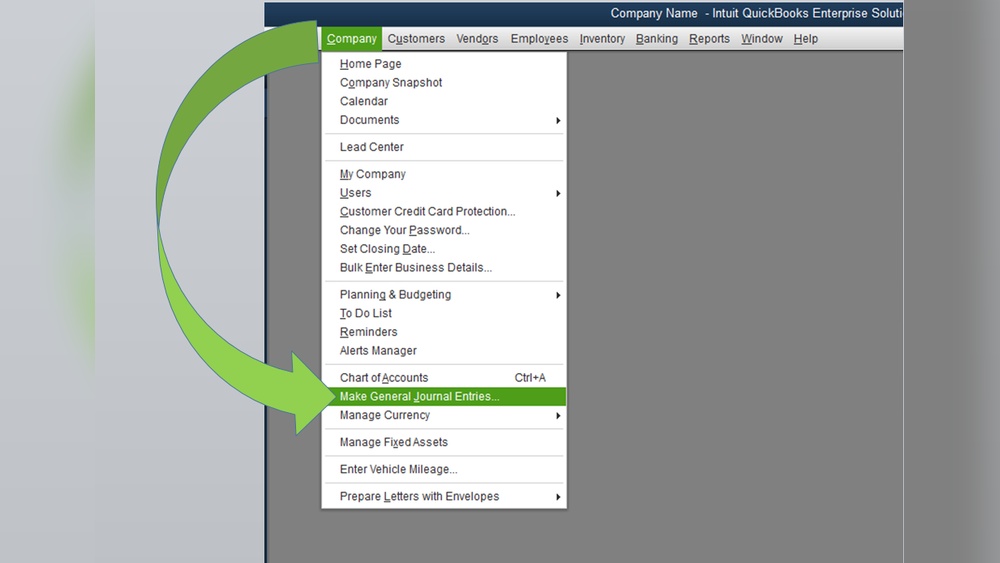
To create a journal entry, go to the “Company” menu and select “Make General Journal Entries. ” Enter the date, accounts, debit, and credit amounts. Add a description if needed, then save the entry. This records transactions not handled by other forms in QuickBooks.
When Should I Use Journal Entries In Quickbooks?
Use journal entries for adjusting entries, corrections, or transactions without invoices. They help record accruals, depreciation, or transfers. Avoid using journal entries for regular sales or expenses, which have dedicated forms in QuickBooks.
Can I Edit A Journal Entry After Saving It?
Yes, you can edit a journal entry anytime. Find the entry in the “Make General Journal Entries” window or the register. Modify the details, then save changes. Ensure the debits and credits remain balanced to keep accurate records.
How Do I Delete A Journal Entry In Quickbooks?
To delete, locate the journal entry in the register or “Make General Journal Entries” window. Click “Edit” and choose “Delete Journal Entry. ” Confirm the deletion. Only delete entries if you’re sure they are incorrect or duplicated.
Conclusion
Making journal entries in QuickBooks is simple with the right steps. Always check your numbers before saving. Keep your records clear and organized. This helps track your business finances well. Regular entries prevent confusion later on. Practice often to feel confident using QuickBooks.
Remember, accuracy matters most in accounting. QuickBooks can support your business growth effectively. Stay consistent, and your bookkeeping will stay smooth.
